Palachinka - Balkan Crepes
Balkan Crepes are thin, mild tasting and tender. Palačinke/ Palaçinka (pronounced PalaCHinka) are perfectly versatile for both sweet and savory fillings. Often enjoyed as breakfast, snack and dessert. With a few common ingredients and no leavening, comes together easily, no baking required, this is a great recipe to bookmark! Most recipes call for a pinch of this, a splash of that and eyeball some whatnot. NOT today! I have measured and re-measured, and tested, and measured again for the most accurate ratios for Palaçinka perfection. You can always stop by on IG @balkanbasics for tips and how-to videos.
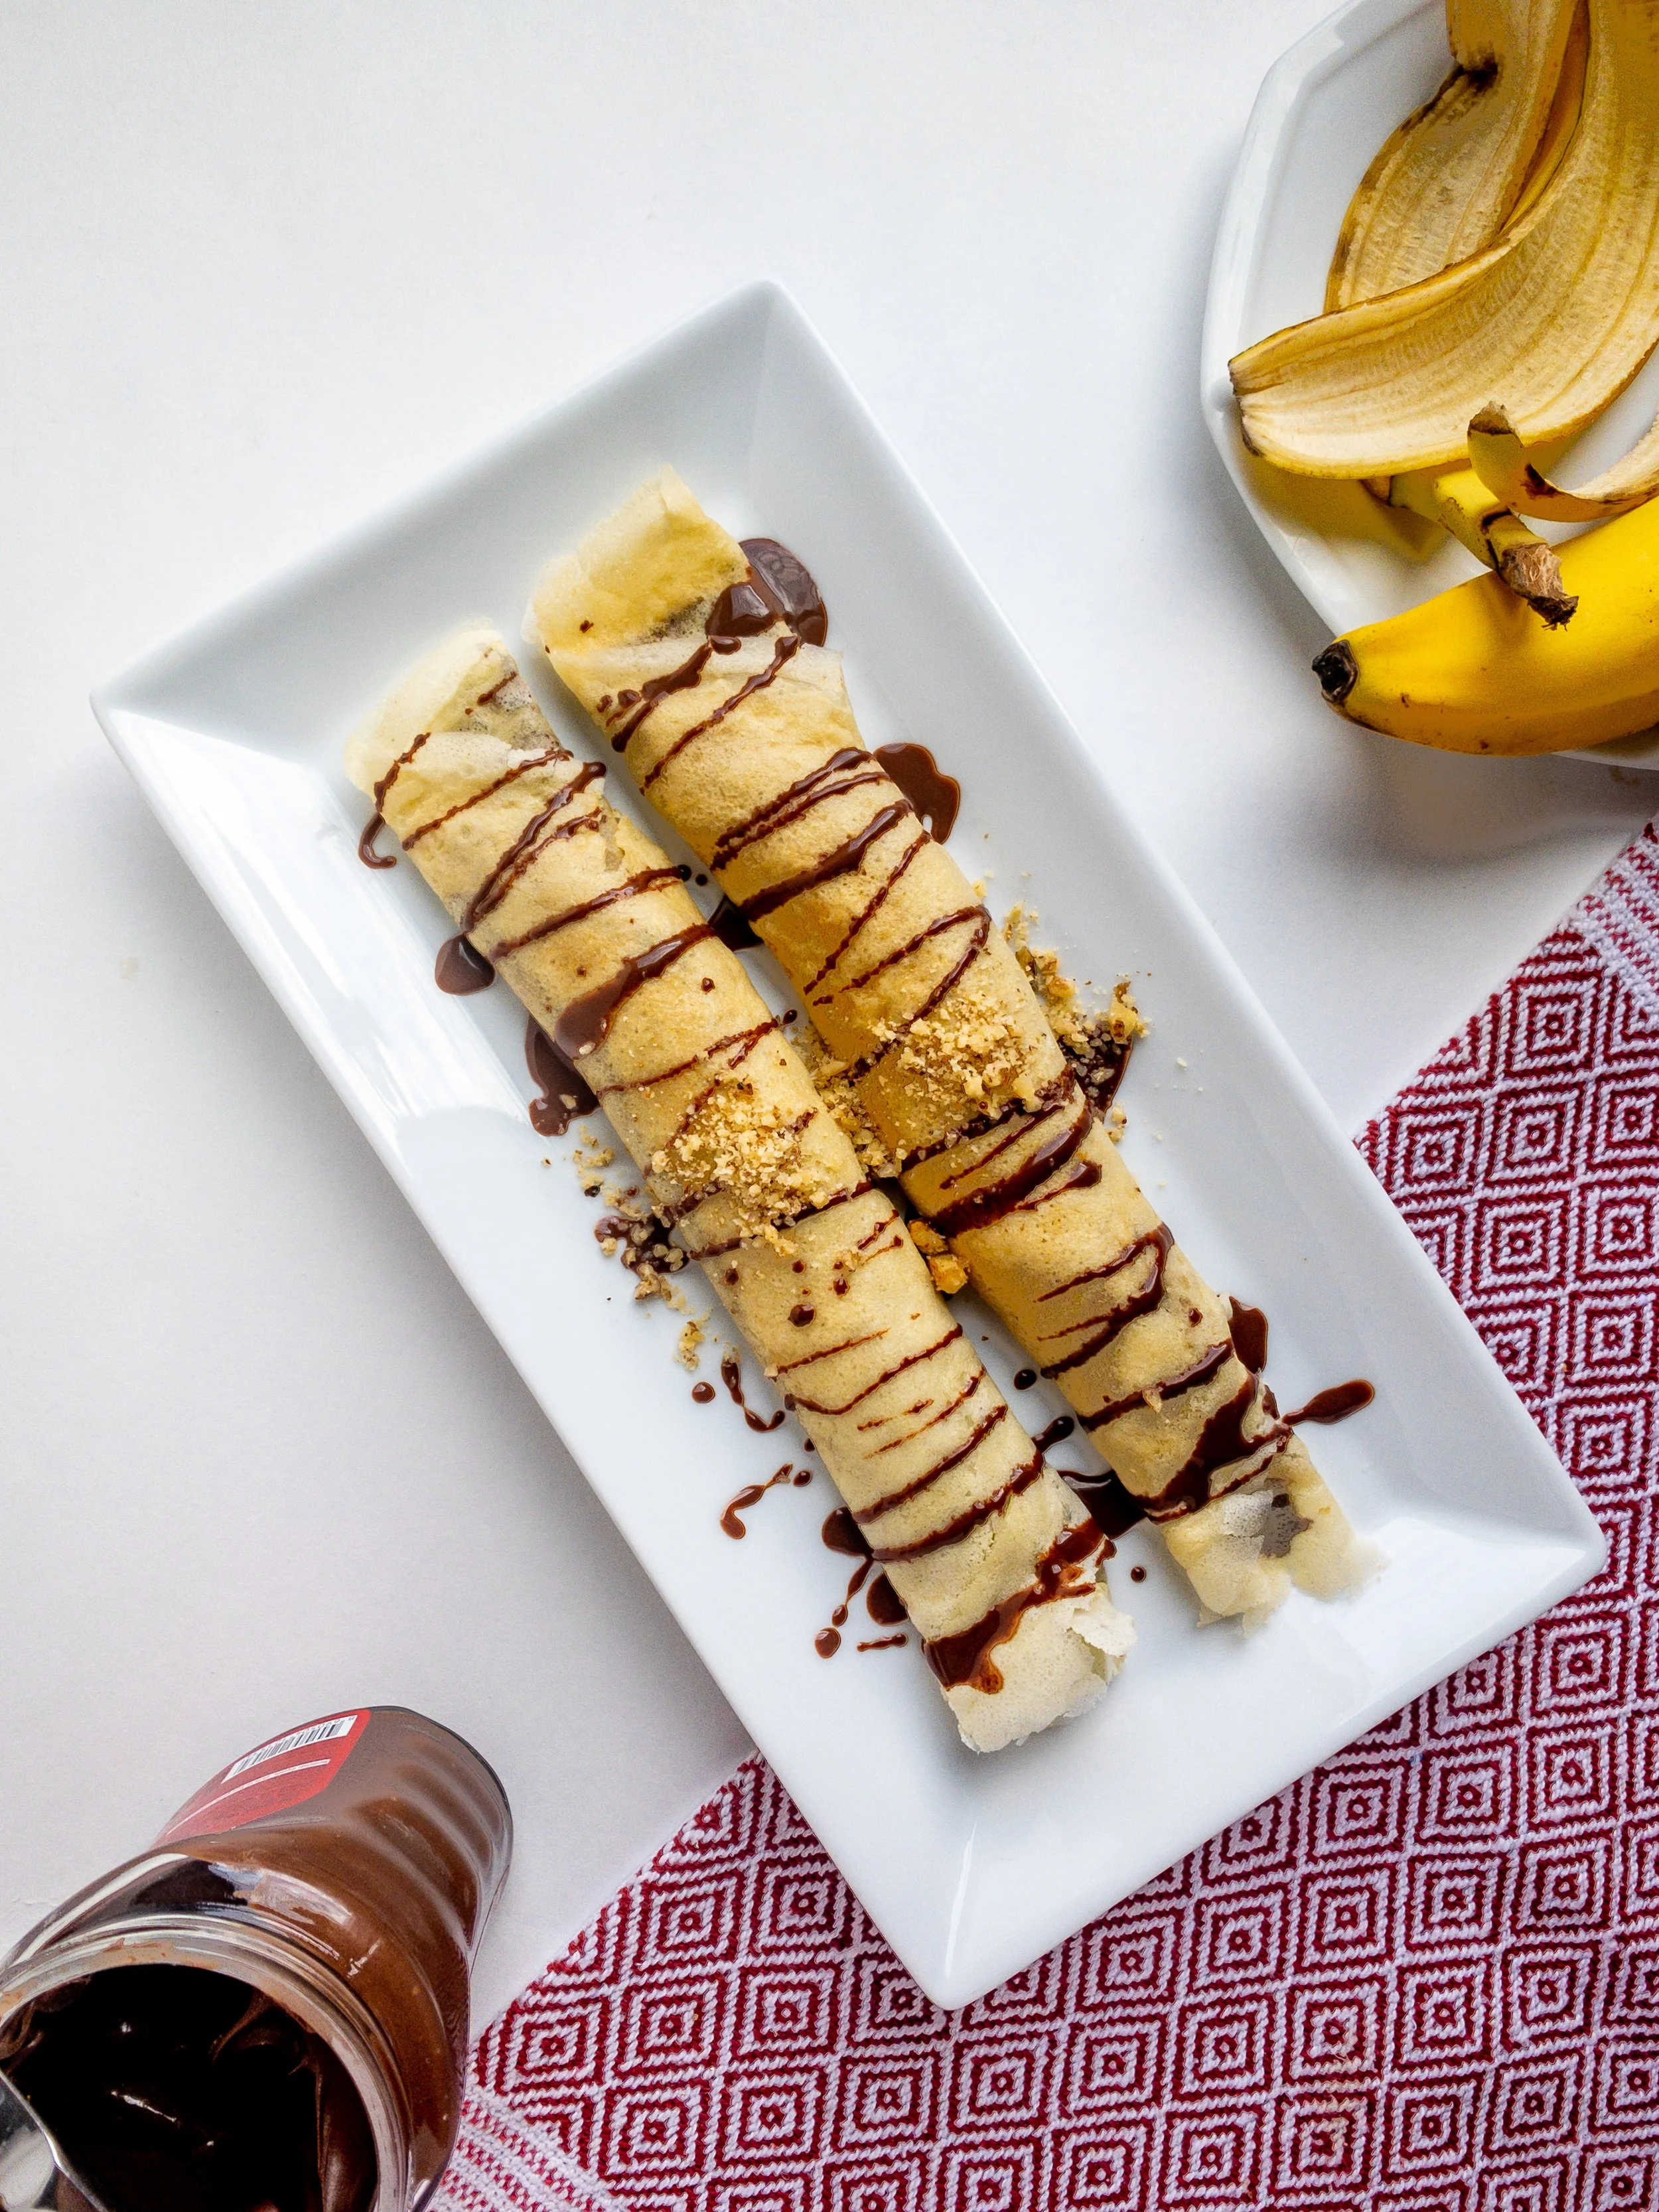
While they're used as a base for many recipes, the most iconic by far is the sweet version of Palaçinka rolled up with banana and hazelnut spread.
TIPS for Best Results:
• For super-smooth batter: use a standing blender or immersion blender. If neither are accessible, whisk batter well after each ingredient addition, in the order they are listed to prevent lumps. If you still have lumps, pour batter through a strainer into another bowl.
• Rest is best: Allow batter to rest to allow gluten to relax. A relaxed batter will yield more tender crepes. batter can be made 1 day before or the night before you plan on cooking them.
• What type of PAN is best? No need for a specific crepe-pan just follow the 12" size recommendations in the recipe. I highly recommend ceramic coated cookware as it is non-stick and non-toxic. (Teflon coated cookware release toxins when exposed to heat.) It is possible to use stainless steel but it requires a little more patience. Cast-iron skillets are too heavy for the swirling motion required to spread batter.
• Shortcut: Two same size skillets can be used to speed up the cooking process. Use one for the first pour and the second skillet for the flip side. You’ll be done is half the time!
• For best texture: enjoy the same day (next day crepes tend to toughen slightly). The best way to store for a few hours or overnight is to wrap snugly with plastic wrap and store in the fridge until you're ready to enjoy.
• GLUTEN-FREE Option: substitute with your favorite Gluten-Free Flour blend.
• What type of MILK is best? The recipe works well with whole milk, reduced fat milk as well as unsweetened plant milks for a dairy-free alternative
• NUT-FREE Garnish Options: Use your favorite allergy-friendly spreadable topping (jam, honey, melted chocolate, cream cheese, cookie butter, cottage cheese, etc)
PALACHINKA (10-12 crepes)
Ingredients
2 large eggs
3 tbsp neutral oil (like avocado oil)
1 c milk (dairy or plant based)
1 c all purpose AP flour (or Gluten-Free blend)
1/2 tsp salt
1 1/4 c water
Optional: hazelnut spread, fruit, chocolate syrup, crushed nuts, whipped cream
Directions
1. See TIPS above before getting started.
2. Add ingredients in the order they are listed to a standing food blender. Pulse until a smooth runny batter is achieved. Remember this is not pancake batter, so don't get nervous at how thin the batter looks. Trust the process. If you're mixing with a bowl and whisk, mix vigorously after each ingredient addition in the order listed to prevent lumps.
3. Allow batter to rest for at least 10-15 minutes, it will make a difference! In the meantime, set the table, wash the dishes, or prep toppings. Batter can be refrigerated overnight or up to 1 day in advance (especially helpful if you're planning a brunch or don't want to wake up the whole house with blender sounds in the morning).
4. Heat non-stick 12" skillet to medium low heat. The pan should be warm enough to allow the batter to swirl around the pan at first then set after coated. Not so hot that the batter immediately sets and doesn't have movement. It's really important that you use non-stick cookware for the best release of this delicate batter.
5. Use a 1/4 cup measurement to ensure each pour is consistent. If your skillet is smaller than 12" use less batter. 1/8 cup batter is perfect for an 8" skillet.
6. The pouring part requires a bit of coordination, but you've got this! Raise the preheated skillet slightly above the heat source. Tilt the pan around while you pour measured batter. The goal is the swirl the batter around the pan to coat the bottom for an even layer. If there are little gaps, it's totally fine! No one will notice when it's rolled up and covered with toppings.
7. The first side is set when the edges of the crepe start to look dry and pull away from the pan. Flip using a wide spatula and cook the other side for a few seconds. Alternatively, you can use hands, but be VERY CAREFUL (lift the edge furthest from you using your finger tips, then flip towards you. This works for me as my hands have build up heat tolerance. But I do NOT recommend it for novice cooks.)
8. The consistency and doneness is more important than the color. The finished crepes should be pale-ish or slightly golden, not too brown. Over-brown color means your skillet is too hot, turn it down a notch. On the other hand if the skillet isn't hot enough, the batter will not coat the bottom, it'll pool up and be difficult to flip. If this happens turn up the heat a notch.
9. Stack cooked crepes as you go, repeat until batter is done. Cover and set aside until you're ready to serve.
Assembly
• Spread 1 tbsp of spreadable topping onto half of crepe leaving the half furthest from you plain.
• Place half a banana (cut lengthwise) on top of spreadable topping, flat side down onto the edge closest to you.
• Roll up and place on serving plate.
• You can cover the palachinka with more spreadable topping or a drizzle of melted chocolate.
• Garnish however you like. Get creative and enjoy!
AJDE, LET’S EAT! Tag me on IG if you try it @balkanbasics